Direct2D initialization
Creation date: 2012-10-22 17:25:34
Last edited on: 2012-10-22 17:34:16
Исходники к уроку:
1. Direct2D initialization source
In this tutorial we'll setup our window template for using Direct2D. Main goal - to understand how Direct2D initialization is occured. After initialization we'll output simple shape on the screen.
Direct2D initialization
Direct2D initialization is pretty simple (in comparing with Direct3D initialization :) and it includes these steps:
1. Creation of factory ID2D1Factory.
2. Object creation, wich will output graphics - ID2D1RenderTarget.
3. Creation of drawing tools (brushes, bitmaps). We'll start to work with brushes - ID2D1SolidColorBrush.
After that you can start drawing with the rendering object.
D2D1CreateFactory function
As in other DirectX libraries, in Direct2D all starts from function too. First, you need to create ID2D1Factory object. This object can create different Direct2D resources.
Function D2D1CreateFactory is used to allocate memory for ID2D1Factory. Function is overloaded. We will use two-argument variant:
!1? templateFirst argument - factory type: singlethreaded, multithreaded. We'll start from singlethreaded, so this argument will be: D2D1_FACTORY_TYPE_SINGLE_THREADED.
Second argument - ID2D1RenderTarget object address. After function's call this argument will contain address of the created factory.
Let's create factory. Before calling D2D1CreateFactory you need to declare ID2D1RenderTarget object:
!1? ID2D1Factory* factory = NULL; D2D1CreateFactory(D2D1_FACTORY_TYPE_SINGLE_THREADED,&factory);?1!Now we can use factory variable for resource creation.
HwndRenderTarget creation
Next goal - to link window of our application with Direct2D. With window handle we can create HwndRenderTarget. This resourse outputs graphics it's create to specified window.
HwndRenderTarget is created with method D2D1Factory::CreateHwndRenderTarget:
!1? HRESULT CreateHwndRenderTarget( [ref] const D2D1_RENDER_TARGET_PROPERTIES &renderTargetProperties, [ref] const D2D1_HWND_RENDER_TARGET_PROPERTIES &hwndRenderTargetProperties, [out] ID2D1HwndRenderTarget **hwndRenderTarget );?1!First argument - reference to filled D2D1_RENDER_TARGET_PROPERTIES structure variable - render target properties. We can automatically fill this variable with calling RenderTargetProperties. RenderTargetProperties is located in the namespace D2D1. D2D1_RENDER_TARGET_PROPERTIES structure is filled with this data: pixel format, resolution (dpi - dots per inch) etc.
Second argument - reference to D2D1_HWND_RENDER_TARGET_PROPERTIES - window properties in wich graphis will be drawn. We can use auxiliary function HwndRenderTargetProperties (also in the D2D1 namespace), which creates needed structure variable. Two arguments are passing to the function: window handle and dimensions of output area. Dimensions of output area must be in the D2D1_SIZE_U format - this structure contains pair of integers: width and height. You don't believe it, but to fill this structure we can use special function SizeU.
Third argument - ID2D1HwndRenderTarget object address, in wich render target resource will be storead after method calling:
!1? ID2D1HwndRenderTarget* rt = NULL; factory->CreateHwndRenderTarget( D2D1::RenderTargetProperties(), D2D1::HwndRenderTargetProperties( hWnd,D2D1::SizeU(rc.right-rc.left, rc.bottom-rc.top)), &rt);?1!Now rt can draw.
That's all with initialization. Let's look, how drawing is happens.
Brush creation
In Direct2D there is different kind of brushes: ID2D1SolidColorBrush, ID2D1RadialGradientBrush, ID2D1BitmapBrush. Today we'll work with only one - ID2D1SolidColorBrush. This brush draws needed area with specified color.
ID2D1SolidColorBrush is created with method ID2D1RenderTarget::CreateSolidColorBrush. This method is overloaded. We'll use two-argument variant. These arguments are: brush color and address of the brush:
!1? ID2D1SolidColorBrush* rbrush = NULL; rt->CreateSolidColorBrush( D2D1::ColorF(D2D1::ColorF::DarkRed), &rbrush);?1!First argument - color, and is filled by the ColorF class constructor, only one argument of wich is ColorF class constant. You can find all constants in the DirectX documentation.
After calling CreaeSolidColorBrush everything is ready for drawing.
Rectangle drawing in Direct2D
All graphics in Direct2D is displayed between two calls of ID2D1HwndRenderTarget: BeginDraw, EndDraw. In my code I place this calls in the main loop after trying to peek message.
Before drawing you need to clear output area. You can do this with Clear method with one argument - background color:
!1? rt->Clear(D2D1::ColorF(D2D1::ColorF::White));?1!Direct2D draws rectangle with method ID2D1RenderTarget::DrawRectangle:
!1? void DrawRectangle( [ref] const D2D1_RECT_F &rect, [in] ID2D1Brush *brush, FLOAT strokeWidth = 1.0f, [in, optional] ID2D1StrokeStyle *strokeStyle = NULL );?1!First argument - rectangle coordinates. We can fill it with function D2D1::RectF. Arguments: x of the left top corner, y of the left top corner, x of the right bottom corner, y of the right bottom corner:
!1? rt->DrawRectangle(D2D1::RectF(200.0f,200.0f,300.0f,300.0f),rbrush);?1!In this case rectangle with size of 100*100 is created. Second argument - brush wich draws rectangle.
Third and fourth arguments are optional. Third - line width, fourht - line type.
Full source code of Direct2D initialization
Let's look at the complete listing. In the source code for this tutorial you can find ready project, which you can build and see result with your own eyes.
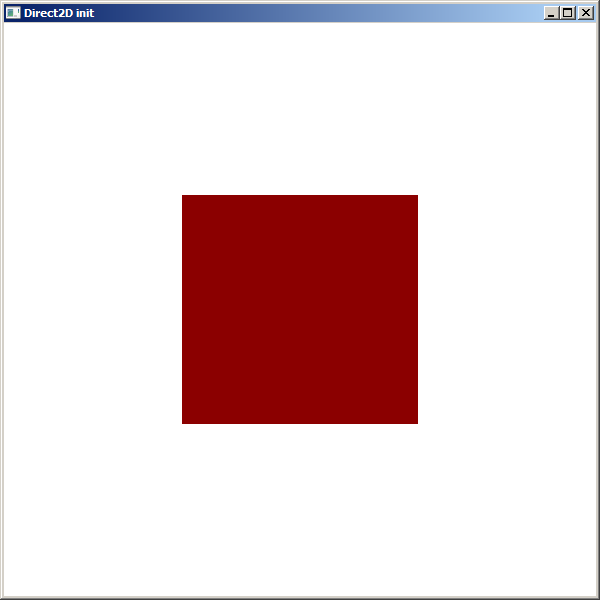
!1? #include <indows.h> #include <d2d1.h> #pragma comment(lib,"d2d1.lib") LRESULT _stdcall WndProc (HWND hWnd, UINT message, WPARAM wParam, LPARAM lParam ); int _stdcall WinMain (HINSTANCE hInstance, HINSTANCE hPrevInstance, LPSTR lpCmdLine, int nCmdShow) { WNDCLASS wc; wc.style = CS_OWNDC; wc.lpfnWndProc = WndProc; wc.cbClsExtra = 0; wc.cbWndExtra = 0; wc.hInstance = hInstance; wc.hIcon = LoadIcon(NULL, IDI_APPLICATION); wc.hCursor = LoadCursor(NULL, IDC_ARROW); wc.hbrBackground = (HBRUSH)(6); wc.lpszMenuName = 0; wc.lpszClassName = L"class"; RegisterClass(&wc); HWND hWnd = CreateWindow(L"class", L"Direct2D init", WS_OVERLAPPEDWINDOW,100,100,600,600,NULL,NULL, hInstance,NULL); ID2D1Factory* factory = NULL; D2D1CreateFactory(D2D1_FACTORY_TYPE_SINGLE_THREADED,&factory); ID2D1HwndRenderTarget* rt = NULL; factory->CreateHwndRenderTarget( D2D1::RenderTargetProperties(), D2D1::HwndRenderTargetProperties( hWnd,D2D1::SizeU(500,500)) ,&rt); ID2D1SolidColorBrush* rbrush = NULL; rt->CreateSolidColorBrush( D2D1::ColorF(D2D1::ColorF::Red), &rbrush); ShowWindow(hWnd,nCmdShow); UpdateWindow(hWnd); MSG msg; while(true) { if(PeekMessage(&msg,0,0,0,PM_REMOVE)) { if(msg.message == WM_QUIT) break; TranslateMessage(&msg); DispatchMessage(&msg); } rt->BeginDraw(); rt->Clear(D2D1::ColorF(D2D1::ColorF::White)); rt->DrawRectangle( D2D1::RectF(200.0f,200.0f,300.0f,300.0f), rbrush,100.0f,NULL); rt->EndDraw(); } if (rbrush != NULL) rbrush->Release(); if (rt != NULL) rt->Release(); if (factory != NULL) factory->Release(); return 0; } LRESULT _stdcall WndProc(HWND hWnd, UINT msg, WPARAM wParam, LPARAM lParam) { switch(msg) { case WM_DESTROY: PostQuitMessage(0); return 0; default: return DefWindowProc(hWnd,msg,wParam,lParam); } } ?1!This program displays window with red square at the center.

Program shutdown
Don't forget to release all resources:
!1? if (rbrush != NULL) rbrush->Release(); if (rt != NULL) rt->Release(); if (factory != NULL) factory->Release();?1!Resume
In this tutorial we learned how Direct2D initialization happens. In next tutorials we'll learn about different types of brushes.
That's it.